The final production session for our demo project was successful and very enjoyable. We commenced the session by assuring the corrective eq we had applied was suitable. We then assigned our group roles for the session and played back the demo taking notes of what we wanted to fix. There were also tracks we wanted to effect by adding creative eq, dynamic enhancement and reverb.
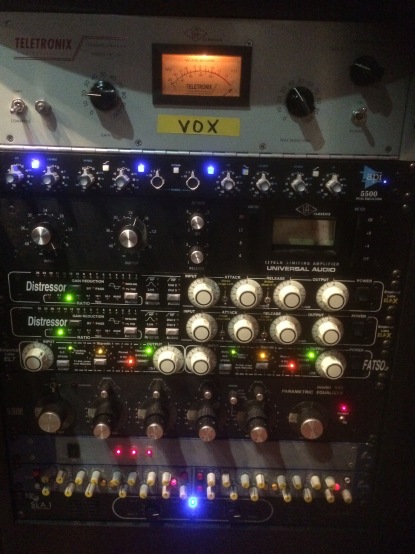
The next stage was to group appropriate tracks before we assigned their outputs to the Neve console for monitoring, setting levels and applying outboard gear. This was essential as we had too many tracks to individually assign to the desk without grouping them.
ANALYSING & SETTING LEVELS FOR OUR FINAL MIX
After making a list of each track/instrument to be worked on in order, it was time to start setting our levels. Before setting levels on the Neve desk all track faders on the console were set to unity while we adjusted levels in Pro Tools. Critical analysis and listening skills were definitely utilised throughout the mixing process. In fact even after setting our levels on the Neve faders, panning, then adding compression and reverb to tracks, we made further adjustments to levels preventing certain tracks from sticking out or not being present enough.
DYNAMICS/COMPRESSOR SETTINGS FOR OUR FINAL MIX SESSION
DEMO PRODUCTION RESULT
The team was enthusiastic, worked hard and we are happy with the result. What was fantastic about working on this project was that we all had unique skills that were required for the production of this demo. It was a lot of fun collaborating with the group, experiencing and learning about the studio production process. I have enjoyed spending time in the studio and slowly getting my head around the equiptment.
With more time, facilities and a budget for the demo we could spend longer on the mastering. We could also take our mix to a professional mastering engineer. Although I feel we achieved a great result and were able to utilise fantastic equiptment on campus I guess with more time, money and facilities we could try out different studio outboard gear and recording spaces.
The group will attempt to master the demo ourselves using plugins in Pro Tools. Below I have included some You Tube tutorials for mastering in Pro Tools.
For our demo project my group like others decided to remake a song called “Distant Friend” written by Trinski Liwanag. This project has given us a great insight into the world of advanced studio production. It has also given us time to learn signal flow on the Neve hybrid console. Initially the group had a mixture of ideas and genres in mind for our remake. However during the first week of studio production we managed to narrow down the genres to Soul/R&B. In fact by playing around with the same chords from the original composition on the grand piano in the Neve band room, we managed to find and record our melody over a beat created in FL studio and imported it into Pro Tools. After deciding to set our tempo at 90 BPM, I felt inspired to come up with some vocal hooks, melodies and a song arrangement.
To work on the melodies and song arrangement I made sure I recorded any ideas I liked on my phone while in the studio with the group. These initial ideas inspired the rest of the vocal melodies for the Soul/R&B remake. After a busy weekend performing interstate I sat down with the lyrics and my phone recorded ideas so I could hear the beat and capture a vibe for the song. Having the words in front of me and making them fit in with the instrumentation instead of having to come up with the lyrics was an enjoyable challenge. I feel when writing or reworking any songs it is important to think about the message and try to convey it’s emotion. I managed to work out an arrangement idea for our song but didn’t manage to complete all the melodies for the lyrics before our second group studio production session. However I had ideas for an intro, a hook, first verse and chorus which was enough for us to build and edit our instrumentation as well as map out, preview, decide and fine tune the song arrangement.
DEMO PROJECT PROGRESS REPORT
Before our third group production in the Neve studio,the group booked studio time in in both the small and large Audient to further develop our song. This was very productive as we managed to record most of the vocals, bass guitar, add synth parts and record live drums using brushes. It also gave me the chance to rehearse some signal flow and trouble shooting exercises on the console. The third production session in the Neve was fantastic because it really gave us the opportunity to analyse, expand and experiment with more vocals, microphone techniques, synth parts, drum parts and recording techniques. The advice from our executive producer/ facilitator was brilliant showing us some valuable production techniques. Another real eye opener for me was the splitting of roles within the group which is an extremely effective way to work.
The following day our group had a booking in the mastering suite where we spent the day applying corrective eq and editing clips in Pro Tools ready for our creative eq and mixing session next Wednesday in the Neve studio. The group has worked exceptionally well together and we are in a great position to successfully complete the demo project next week.
One of the most pressing issues with this production was deciding what genre to focus on as a group and coming up with the initial idea. To begin with we struggled to make a start and find the perfect direction. However once we refined the idea we continued to make great progress. Other minor issue we faced were the occasional signal flow errors which is to be expected getting used to a new console and some latency during vocal recording which was resolved by turning off certain plugins while recording vocals. Although we had put in many hours recording our track before our third session in the Neve our remake was missing something. This made for great discussion and idea sharing with the group until we created the missing elements.
A great plugin called Vocalign was introduced to us during production. This powerful plugin is an amazing tool for lining up clips/vocals together. The quality of this editing is outstanding. I was so impressed I decided to do a little You Tube research.
The final jingles project was exciting and mind opening which gave me an insight into the world of composing for film. This is definitely an area I would like to persue in the future. The movie trailers and commercials stimulated my creativity for composing the music. I would employ this technique in the future when working on audio projects. The only issue with this could be the lack of ram with my current computer when composing music and film at the same time. However there are still ways I could work around this issue for e.g. (buying more ram or saving finished projects to backup hard drives and making space for new projects).
There were definitely changes to my jingles timeline along the way. The most obvious change was the amount of time I spent working on each Jingle. I went over the scheduled 3 hours per day on the plan. It was more like 10 to 11 hours per scheduled jingles work day. I put in long days on the weekends and as a result of these extra hours I managed to have my jingles ready ahead of schedule. I became aware that I had over five minutes of trailers and commercials on my jingles timeline so I discarded the BMW commercial.
THE PROCESS I FOLLOWED (JUSTIFIED DECISIONS) & ISSUES FACED
Although the process mentioned on my timeline changed along the way it provided me with a direction and aim. By planning the timeline before starting the jingle process gave me a clear indication of the workload involved. The Jinn movie trailer was the longest trailer to complete. The first step was finding the sound effects and syncing them appropriately which took longer than anticipated. When I thought I had covered every sound and lined them up perfectly I became aware of new sounds that had to be found, edited and placed into the trailer. When I played my trailer to members of my group as well as other students they mentioned that I could tighten up the timing with some of sound effects particularly the voice overs. The sound effects process went overtime but was a necessary exercise to improve the trailer. There were many other sound effects I’d found and imported into Pro Tools that didn’t get used in the trailer. This was because I didn’t want to overdo the sound effects so I had room for the music and voice which was important. Another problem I had when creating this trailer at times was the computer freezing on me. By constantly rewinding and playing back parts with the Pro Tools video player it would get stuck which meant I had to save, close and restart the session when ever the problem presented itself. I attempted to try and fix this by playing around with the playback engine on Pro Tools. However restarting the computer worked best. I kept on persisting, fixing it step by step or changing computers if was too slow. When it came to mixing and mastering this trailer controlling the peaks meant I would constantly be analysing the mixer and adjusting levels. My aim by mixing stage was to find a good balance and have my levels hitting around the minus 5 db point on the master fader. This way I could raise up the levels by adding a compressor limiter on the master track at mastering stage. At one point I had to solo every track
playing the session from beginning to end while keeping my eyes on the levels on the mixer to see what was peaking. I could not find what it was until I repeated this step and found that I had peaking on one of the aux reverb sends. Turning down the send instantly fixed the problem and made me aware to be mindful of this in the future. Mastering this tralier took less work and when peaks were visible I would make slight adjustments to the threshold, attack and release settings on the compressor or adjust levels on the mixer channels.
Completing the first trailer was good preparation for my next jingle. Once again my Redstripe Beer commercial required sound effects. I began the process by sourcing and placing sound effects into there correct positions. The difference this time was that I already knew the style of music I wanted for the commercial. The lyrics were written and the beat was already programmed in Protools using Ableton via rewire. Having a clear idea before hand really helped the creative and mixing process. I created extra dialogue to expand on the story from the orginal commercial. Originally the bear had no lines but making use of Pro Tools pitch shift I managed to create a bears voice as well as pitching up my vocals to create a womans voice. When it came to mastering my levels had no peaks so balancing the instruments and dialogue was the most important part of this process.
Creating a jingle for the Victorias Secret commercial was a very enjoyable experience for reasons other than working with very attractive footage of models. Firstly it gave me the oportunity to create a jingle using Ableton which I hadn’t done before. Secondly my intentions were to make this work with out any dialogue or sound effects and to explore and test my Hip Hop/Trap/R&B production skills. My main issue with this was that I got so used to working with protools that I had to do some Ableton revision which was a little time consuming with the busy schedule I had. After consulting with fellow students I found out how to create the triplet effect on the hats and side stick which I really wanted to learn. Mixing and mastering was pretty staright forward as I kept my eyes on levels this time before mixing.
MY MAIN ISSUES: When it came to previewing our tralier progress in class twice I had issues and was unable to preview my work to the class. This was a bit disappointing and made me a little worried that my final files wouldn’t work. This brings up the topic of naming and file convention. I am determined to get on top of this area. What confuses me the most is when creating a save copy in version in Pro Tools, then having to zip the folder to fit it all in my external drive. This would create several copied versions of the sessions. If I didn’t save copy in and tick audio files/video files after working on my sessions I would have lost a lot of hard work. However getting rid of the copy of copy text on these folders made things less confusing. A better alternative is to write mix1, mix2, mix3 on so on at the start of the copied file I was saving. Next time I want to preview my jingles in class or to a client I will bounce a quicktime file instead of trying to preview from Pro tools or Ableton sessions. This would save me a lot of trouble and embarrassment.
The other issue I had was working out how to add the disclaimer to my Pro Tools sessions. It was not possible to import two video files into the same session which meant that I had to find another way. As a last resort I could have created my own disclaimer on you tube by writting it as text on my uploaded video notes, however I became aware that other students were having the same problem and had found a solution. The solution was a student who was familiar with a program called Premiere which easily allowed the video disclaimer file to be added to my trailer and Redstipe commercial. The student kindly took time to add the disclaimers and run through the process with me so I know next time.
A REFLECTION ON HOW WELL I ACHIEVED MY OBJECTIVES
When given the brief for the final jingles assignment my initial thoughts were “how exciting but how am I going get my head around some of the challenges involved with this process. Especially since problems with my own computer would prevent me from having extra time to work on my Jingles at home. The majority of work was completed at SAE which worked out well. Initially I found working at SAE a little distracting because I am used to working at home with studio monitors in complete isolation. However by choosing to utilise the facilities on campus on a daily basis I managed to get into a good routine and utilise the great assets I don’t have access to at home. It also allowed me to preview my progress to other students and members of my group who gave me useful feedback. By putting in a lot of hard work I managed to receive a great result and feel like I have made a great start to creating jingles.
Seeing these results was very satisfying and when referring back to my jingles timeline I feel that I have managed to acheive the results I was after for each Jingle. There is always room for improvement but this will come with experience and practise. So far so good. One of my greatest concerns was how was I going to make my Victorias Secret Jingle have the triplet feel on the hats and side stick that I was after. How was I going to put this in the R&B hip hop world and make my kicks stand out? After spending many hours in class mixing a soundalike session for a class exercise my knowledge of compression improved. Basically I learnt from my mistakes and ignorance when it came to understanding compressors and how they work. In the end these challenges and doubts were overcome and I was excited by the results.
What really impressed me about my efforts with this project was that I managed to finish all my Jingles before the timeline deadline. To hear that all three jingles were included at the exhibition was great because I had only expected to complete two by that time. I am gaining knowledge and confidence with my production which is a huge accomplishment compared to when I started the course at SAE.
My freelance work for the CAT and Mice Game was also a confidence builder. My duty was to mix the music composed by two other members of the project team. Having to mix alot of stems or instruments can be quite overwhelming especially since I was not very confident at mixing. A challenge but I really want to continue to improve in this area. A big part of taking on this coarse in the first place was to become great at this and to have the ability to mix some of my own music instead of relying on others which can be expensive and time consuming. The great thing about mixing the music for the Cat and Mouse game was that although I had three different pieces to mix there were not too many stems to mix for each. This allowed to put time into perfecting each stem. To be honest the music was very well composed and I had great instructions from the group about how they wanted the mix to sound. Remembering my lecturer once saying that sometimes with mixing it is important to not spend too much time mixing and to give it a deadline. This helped. The group and client were happy with the mixes. For each mix I used corrective EQ, compression, with reverb or delay via aux sends to individually effect each element. My only challenge with this project is that I had so many other projects happening at the same time. This however was a good thing because I am learning about managing more than one project at a time and how to work under pressure.
For my Jingles project I have decided to compose 4 pieces. For the first piece I will be working on a movie trailer for Jinn a super natural thriller. This is first on the list of priorities as it will take a lot of collecting, creating sounds and editing requirements. However I am excited by the action and visuals in this trailer. This is a great opportunity to explore and expand my creativity. Watching films is a hobby of mine and I am looking forward to getting started on this project.
The remaining 3 pieces I will be working on are TV Commercials. The first is a Red StripeBeer commercial. I will be incorporating sound effects as well as composing music in the genres of Dancehall and Reggae. It is quite possible I will be collaborating with other members of my team to compose the music and record the voice overs for this commercial.
The second TV commercial is for Victorias Secret. I feel like this project gives me the opportunity to have fun and step outside the box creatively. This time I would like to compose a stylish, soulful, sassy, Hip Hop, R&B inspired piece. I may also incorporate previous lyrics of mine that were never used into the Jingle. However I plan to not over do the instrumentation. Instead I am going to keep it minimal and bring out elements such as the drums,percussion, synth parts and bass via use of processing. This may be done in the EMP Studio or in the Audient Studio using outboard gear…. To Be Continued…..
The third TV commercial is for BMW 7 Series. I will be collecting many sounds for this short TV commercial. In particular splashing water sounds which will be suitable for this commercial. I will also compose music and find other appropriate sounds to fit this commercial.
Although I have come up with an individual time line for the Jingle project a few changes may occur during the process. Plans and decisions may change after meetings and other considerations to do with the project. I have purposely planned the order of the project according to their duration and workload.
INDIVIDUAL JINGLE TIMELINE
WORK HOURS STARTING FROM SAT 16TH APRIL WEEK 10,11,12,13
week 10: 9 hours work in total: Monday 18th (3 hours), Wednesday 20th (3 hours), Thursday 21st (3 hours)
week 11: 9 hours work in total: Monday 25th (4 hours), Wednesday 27th (3 hours), Thursday 28th (3 hours)
week 12: 9 hours work in total: Monday 2nd (3 hours), Wednesday 4th (3 hours), Thursday 5th (3 hours)
week 13: 9 hours work in total: Monday 9th (3 hours), Tuesday 10th (3 hours), Wednesday 11th: SAE EXHIBITION DAY (All Day) Thursday 12th (3 hours)…*DUE DATE: Friday 13th MAY!!!!
= 40 allocated hours work on Jingles Project + Extra Work Hours!!!
Extra Work Hours include: Weekends,allocated class hours & after class hours….*Note: Hours lost during the week are to be made up on weekends.
(important not to slip too far behind during the weekdays)
JINGLE WEEKLY TASKS
WEEK 9 TASKS:(APRIL 16th to APRIL 17th)
Saturday 16th: *Write timeline & plan *Make final decision 1 movie trailer and 3 adds (5min in total)
Sunday 17th: 10am-1pm Load Mp4’s into pro-tools, online search for sounds, work on movie trailer rough draft.
WEEK 10 TASKS: (APRIL 18th to APRIL 24th)
Monday 18th: 10am-1pm 1. Research (WEB) (LIBRARY) for movie trailer, 2.Contact team members.(TRELLO) TRAILER = Jinn (Super Natural Thriller), 3.Find suitable sounds for movie trailer… *MOVIE TRAILER= Jinn (Super Natural Thriller) Duration 2:28 NOTE: 1 hour allocated for setting up and editing group WordPress site.
Wednesday 20th: 10am-1pm Compositionfor Jinn movie trailer (Home Studio) or 2pm-5pm (EMP Studio) 1a Finding and editing sounds, 1b creating sounds from scratch, 2 composing/tracking music on Pro Tools, Logic, Ableton Live, 3 voice overs..
Thursday 21st: 10am-1pm Composition for Jinn movie trailer (Home Studio) or 2pm-5pm (EMP Studio) 1a Finding and editing sounds, 1b creating sounds from scratch, 2 composing music, 3 voice overs..
Saturday/Sunday: Finish Composition for Jinn movie trailer
WEEK 11 TASKS:(APRIL 25th to MAY 1st)
Monday 25th: 10am-1pm Research for RED STRIPE Beer TV commercial number 1, contact team members, supervisor, organise meetings etc…*TV COMMERCIAL number 1= Red Stripe BeerDuration 1:10…*NOTE: 1 hour allocated for editing group WordPress site if necessary.
Wednesday 27th: 10am-1pm Composition for RED STRIPE Beer TV commercial number 1 (Home Studio) or 2pm-5pm (SAE Studio) 1a Finding and editing sounds, 1b creating sounds from scratch, 2 composing music, 3 voice overs
Thursday 28th: 10am-2pm 1a.Research for Victorias Secret TV commercial number 2 1b…* Research BMW 7 Series TV commercial number 3, 2.contact team members, supervisor, organise meetings etc…*TV COMMERCIAL NUMBER 2= Victorias Secret Duration0:45
TV COMMERCIAL NUMBER 3= BMW 7 Series Duration 0:45
Saturday/Sunday: Composition for TV Commercials 2 & 3 (Home Studio) or 2pm-5pm (SAE Studio Saturday only)..1a Finding and editing sounds, 1b creating sounds from scratch 2.composing music, 3 voice overs..
WEEK 12 TASKS: (MAY 2nd to MAY 8th)
Monday 2nd: 10am-1pm Composition for TV commercials number 2 & 3 (Home Studio) or 2pm-5pm (SAE Studio 1a Finding and editing sounds, 1b creating sounds from scratch, 2 composing music, 3 voice overs. NOTE: 1 hour allocated for editing group WordPress site if necessary..
Wednesday 4th: 10am-1pm OR 2pm-5pmStart mixing movie trailer (Home Studio or SAE Studio)
Thursday 5th: 10am-1pm Finish mixing movie trailer Home Studio) or 2pm-5pm (SAE Studio)
Saturday/Sunday: Start mixing TV commercial numbers 1,2, 3 (Home Studio) or 2pm-5pm (SAE Studio Saturday only)
WEEK 13 TASKS:(MAY 9th to MAY 12th)
Monday 9th: 10am-1pm Finish mixing TV commercial numbers 1,2,3 (Home Studio) or 2pm-5pm (SAE Studio), get feedback, make adjustments…*NOTE: 1 hour allocated for editing group WordPress site if necessary.
Tuesday 10th: After class 6pm-9pm Make any final changes or adjustments regarding mixing, editing and uploading…. Have 1 item ready for exhibition (Home Studio) Or (SAE Studio & LAB)
Wednesday 11th: Exhibition Day (All Day) Have the Movie Trailer or TV commercials ready for display.
The track my group chose for a sound a like project is “Super Freak” by Rick James. Although research material for this track is scarce I have gathered information by using my ears and finding out as much information as I could. Despite the challenge I am learning a lot about Rick James and disco funk production from the late 70’s and early 80’s.
ANALYSIS OF SUPER FREAK
1.The song structure/arrangement for Super Freak is as follows:
At the very beginning of the intro is a drum flam followed by a full drum beat, famousbass guitar melody, synth chords and piano chord chops for 8 bars. At the end of the 8th bar is a crash cymbal.
During the verse the synth parts are taken out leaving Rick James vocals the bass and piano stabs. During the 8th bar of the verse the flexatone is struck adding flavour and marking the half way point of the 16 bars. After the 16 bars there is a change in the verse introducing an extra synth part. There is also a call and response harmony sang by Rick James and the Temptations.
The pre chorus again introduces a new element to the song with the bass line changing notes, the drums crashing cymbals at the end of each bar with a fill at the end leading into the chorus . The synth parts and piano are not included in the pre chorus. Rick James is accompanied with harmonies from the Temptations.
Similar to the intro the chorus brings back all the instruments including the synth, piano stabs, bass guitar, drums crash cymbal, lead vocals and harmonies.
The second verse is similar to the first verse for 8 bars utilising the bass piano stabs and striking the flexatone included during the verse and on the 8th bar. However this time call and response backing vocals are also used. For following eight bars the synth is used adding variation and dynamics to the verse .
The extra synth part is once again used after 16 bars along with the call and response part before the second pre chorus. Other instruments heard are the piano stabs, crash cymbals and same bass melody with a few extra rhythmic notes.
The pre chorus uses the same bass line and synth melody as the first pre chorus. The drum fills and cymbal crashes are also very similar if not the same along with the harmonies by the Temptations with Rick James screaming out the lead vocals.
For the second chorus the bass, synth,drums, piano chord stabs and lead vocals can be heard. However this time instead of harmonising on the word super freak, Rick James sings this part alone but interrupts the full chorus by introducing the hook sung by the Temptations. He then sings his chorus for another bar and goes back to the Temptations hook.
The 3rd verse follows straight after the hook only this time the verse is cut after the 8th Bar. Instruments used in the verse are bass, piano chops, drums, crash cymbals and again the flexatone is struck on the 8th bar.
After the 8th bar there is a saxophone solo. To enhance this change in arrangement the alternate synth part is played during this section. Other instruments include bass, drums and piano chord chops. I notice that the crash cymbals aren’t used in this section. Perhaps this was to not take away the focus from the sax solo.
The sax solo playing for 14 bars in total is also the part used to outro the song fading out by about the 14th bar.
3.Rhythm:
Super Freak is in 4/4 time and uses eighth notes. The use of double kicks after the 1st beat count is noticeable and makes the beat funky along with the catchy bass line. Drum fills utilise the flam and cymbals. No toms are used.
4.Dynamics:
I found that the change in dynamics are not obvious throughout Super Freak. The section that stood out and really builds in energy is the pre chorus where cymbals crash and Rick James builds up energy with his vocal delivery leading into the chorus. However I found that instruments were carefully placed throughout the song making sure they would add a change to the arrangement but not create too much chaos by clashing with other instruments.
5.Production:
Super freak was co written and produced by Rick James and Alonzo Miller. It was put together quite quickly while sitting in the studio with everything else on the Street Songs album completed. Rick wanted to write a silly song ,came up with a lick and elaborated on it with vocals. He created the bass first then added guitar and keyboard. Making use of the tuning feature on the Oberheim OB-Xa which he had wanted to include as part of his production he came up with the ghost like synth parts. He also made use of his passion for opera and classical music by adding the voice structure to melodies he came up with. This was also very evident in the delivery of his own vocals particularly in the pre chorus parts.
Although it is hard to pin point exactly what effects and equipment were used during the production and mixing stages of Super freak, I noticed traces of reverb used on the vocals and synth parts. Another effect used during the second verse with the call and response vocals was a George clinton P-Funk effect created by speeding up and slowing down the tape machine. A lot like the Transpose feature in Ableton.
When tracking the drums for our sound- a- like project one thing I noticed was the use of panning in this song. Using a pro tools panning plug in to inspect the track showed that the bass was panned far right but sounded like it sat in the middle of the mix when the plug in was bypassed.
6.Performance:
Super Freak was initially constructed by Rick James coming up with many of the parts and exchanging ideas with Alonzo Miller. What is difficult to work out is if Rick created and performed the drums himself. This is quite possible as he used to play drums for a band. He may have however used another drummer along with a saxophone player.
The song feels like it was recorded with a band together jamming out all the written parts. It has an energetic live feel and sound. I’m guessing the Temptation harmony parts were recorded as over dubs but they may well have been recorded live with the band.
7.Vibe:
Super Freak has a funky, upbeat, catchy, disco, synthesised, operatic and wild vibe.
8.Technology:
Considering this song was written in 1981 I presume they used equiptment such as analogue synths, possibly drum triggers or hydraulic drum heads, outboard reverb units, analogue console, outboard compressor, and definitely tape machines.
“RICK JAMES SUPER FREAK”
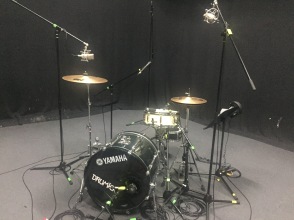
RECORDING THE DRUMS (SESSION 1)
On Friday 21st of March we had our first Sound A Like recording session. Recording the drums was one of the most involved and challenging parts to match for Super Freak. I think we have achieved a descent result so far.
When we get to the stage of adding the claps to the snare it will glue the drums together making them sound closer to the original. I have been looking into ways of achieving this classic clap. The most obvious way is by using recorded hand claps . The second option could be to duplicate a snare track and put it through a drum trigger plugin on Pro tools replacing the snare with a classic 808 clap. This track would be added to the recorded kit snare track.
An article I found mentioned that classic George Clinton and Rodger Troutman funk clap was achieved by using Tape machines. This was achieved by speeding up the snare and tuning the drum machine clap down. Perhaps there could be an alternative way of doing this.
Briefly running through signal flow on the large Audient desk was refreshing because of my interest in analogue recording, the use of outboard gear and using the patch bay.
This was a larger desk than I have operated in the past so was more involved than previous signal flow and patching I have already experienced. Further learning was required.
The next stage was to figure out each team members role for the recording session.Due to a few members not being available our roles doubled giving me the duty of Microphones and Patch Bay operations. I found it important to go with the flow as much as possible, drawing on my past patch bay experience whilst getting my head around newer information.
We were then introduced to the studio equipment kit for miking the drums and discussed our plan of attack to match the drums on Super Freak. There seems to be very little information available about the original recording.
What we had worked out was the dominant drum parts were the kick drum and snare. There were no toms used and the hi hats and crash cymbals sounded distant like they had been miked using overheads.
We were after a damp snappy sounding snare hit. To make sure we didn’t get a longer ringing on the snare we miked the snare top with an SM 57 and decided to put my empty wallet on the snare top to dampen it even more. We also miked the snare bottom.
Our very skilled session drummer ran through the process of tuning the snare drum. Tapping around the snare making sure the pitch was fairly consistent around the whole snare (No obvious changes in tone). Tuning the top in a criss cross manner is a technique I use when tuning my hand drums.
Although I got the general gist about tuning the snare bottoms I plan to explore this even further to achieve the specific sounds I am after and to become an expert on what is required.
The kick had more of a click sound rather than a boomier kick sound on the original so we put spare items of clothing and anything else we could find inside the bass drum to dampen the boom of the kick. The Sennheiser e 901 kick drum mic was positioned on the outside of the bass drum close up to the skin. Apparently another method to achieve this result is to put the mic halfway inside the bass drum. Also adding a little padding to dampen the boom.
For the overheads we used 2 pairs of Neumann TLM 300 condenser mics. It was important to place left and right mics at an accurate distance away from each other and the cymbals to avoid phasing issues. It was also important to tilt and face the diaphrams towards the cymbals.
Although it wasn’t vital we all agreed to use a Royer 101 Ribbon Mic to capture some room sound. Having this as an option could add an extra effect and ambience to the drums . Preview it sounded quite warm and effective.
After setting up the mics, tuning the drums and getting our pro tools session outboard gear and desk ready for our drummer to record came our duties in the control room. Although I was assigned to looking after the patch bay further patching wasn’t required. Another important role explained to us was communicating with the drummer.
I decided to participate in this role. I felt like I dealt with this role reasonably well though some of the technical info went over my head but I was learning. I gave it a good go. What I found important about this role was keeping the drummer informed, taking notes, remembering and listening out for parts that the drummer could improve .
Having a track dedicated for the original reference track is essential for sound a like projects. This way we could compare the recorded performance to the original as well as hearing the recorded drums by them selves.
For this blog I will be examining an electronic music producer/artist’s approach to synthesis in their music production. Before focusing on a particular genre to write this blog, many hours went into researching producers and their use of synthesis especially R&B and Hip Hop producers such as Timbaland and Big D.
The similarity between Hip Hop/ R&B and Dancehall production are the tools used to create the sounds. This includes MPC’s, vintage compressors, reverb units, patchbay, filters, pre amps, plugins, digital interfaces and the DAW. A selection of keyboards like the Korg Triton are used to achieve a big orchestral sound.
The hands on approach makes these genres of music exciting to produce. It is essential to have the tools to be able to put down ideas straight away, tapping drum machine pads and playing chords spontaneously when inspired.
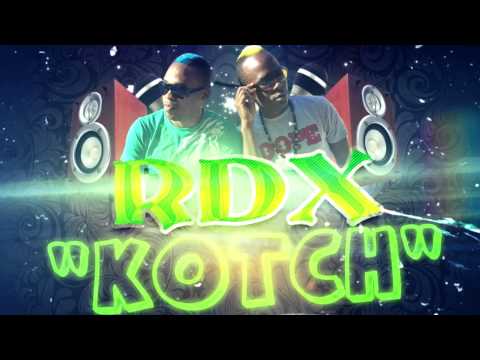
RDX-KOTCH RIDDIM PRODUCED BY CASHFLOW EXTREME
I have chosen to explore a modern Dancehall producer. My reasons for choosing a producer of the same genre as my previous blog is mainly to do with the fact I am working on a Dancehall remix and for the use of synthesis in this song and in Dancehall music generally. The song I examined is “Kotch” by RDX produced by Cashflow Productions. This song was released in 2014 having a big impact in the Dancehall scene.
When producing the “Kotch Riddim”, Cashflow uses a 25 Keys Oxygen Keyboard with an interface and laptop running either Logic X or Ableton Live. He begins by constructing the drum pattern step by step beginning with the kick drum followed by the snares. He then finds a brass synth sound to add some lower chords followed by additional brass synth chords placed just after the lower chords.
Similar to the role of a rhythm guitar he again adds higher synth brass chords followed by very minimal percussion. The next step is to add the bass which follows most of the Synth parts. Finally he adds a synth melody that glues the whole song together.
When producing the beats many different synth parts are composed. Whether or not all parts get used depends on the song arrangement and the artists voicing the riddim. What I have noticed about this style of production is like Timberland the synth chords and melodies are played like percussive instruments working with the drums.
YouTube,. (2016). R&B/Pop Track in the making…WATCH IN HD (“Big D” Studio Session). Retrieved 28 February 2016, from https://www.youtube.com/watch?v=XDbjEP9DHsc,. (2016). Retrieved 28 February 2016, from http://

 AUSTRAJAM PRODUCTIONS 2016
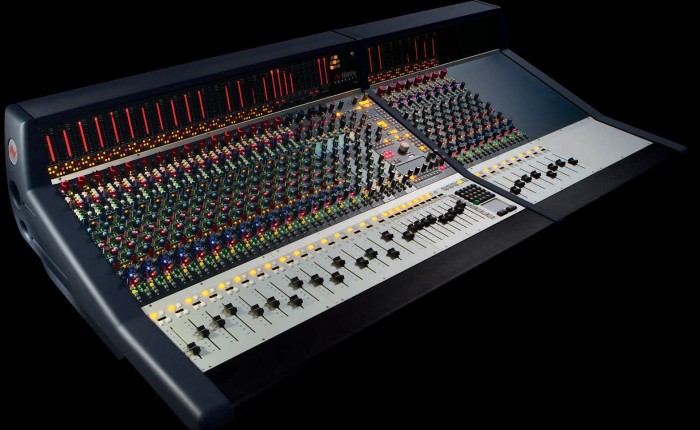


 AUSTRAJAM PRODUCTIONS 2016